
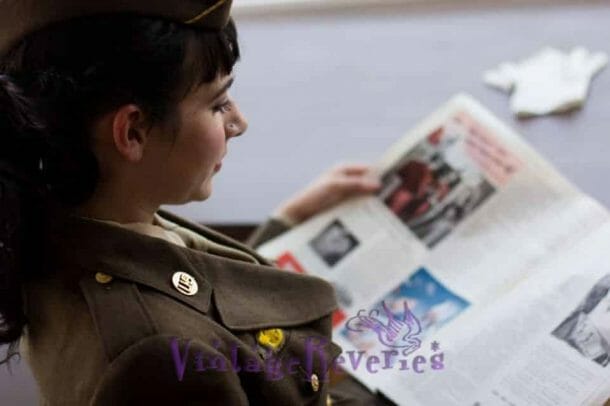
The IronRite Ironing Machine, particularly models 80 and 85, revolutionized the way we approach ironing, blending efficiency with simplicity. This guide, enriched with scans from the original IronRite Automatic Ironer instruction manual, offers a comprehensive walkthrough on utilizing this vintage marvel to its fullest potential. Whether you’re tackling everyday items or delving into more intricate garments, these instructions, accompanied by insightful photographs and captions, will ensure you achieve impeccably ironed clothes every time.
All of these instructions have helpful photographs with informative captions.
Below is the text about how to use an IronRite Ironing machine, as captured from the scanned pages of the IronRite manual:
How to iron with an IronRite Ironing Machine:
Start with simple pieces to familiarize yourself with the operation of the Ironrite. Begin with items such as towels, handkerchiefs, and pillow cases.
FLATWORK: To get acquainted with the Ironrite, start with simple pieces first. For towels, feed them into the machine right side facing the shoe, ensuring the hem of the towel is placed straight on the forming board (Fig. 1). Allow the hem to go under the roll sufficiently so the entire hem end is ironed underneath; this ensures the towel is ironed perfectly straight. As the towel passes through the ironer, gently smooth it out, but do not pull on the corners while the towel is being ironed. The Ironrite’s even pressure means pulling can cause unevenness. Fold the towel to your preference.
PILLOW CASES: To iron plain pillow cases, feed the closed end first (Fig. 2). Iron up to the hem end, utilizing the left-knee press control on all hems to thoroughly dry them. Then, turn the case over and iron the other side. For folding, the case should be folded in thirds lengthwise (Fig. 3), doubled over, and ironed (Fig. 4).
EMBROIDERED PILLOW CASES: Iron embroidered pillow cases by slipping the open embroidered edge over the shoe and forming board, with the embroidered side facing the padded roll. Keep the edge at an angle (Fig. 5). Raise the roll at times and readjust the material. Take the case out and iron from the closed end down to the embroidery which has been previously ironed. Iron the other side and fold to suit.
NAPKINS: Iron linen napkins on both sides. For plain napkins, place the wrong side next to the shoe (Fig. 6). Turn and repeat on the right side. Ensure the edge of the napkin starts straight with the forming board and goes under the roll to finish evenly. Do not pull on the corners as it goes through the ironer. Fold the napkin double, feeding the open edges in first and ironing down onto the fold (Fig. 7). When ironing the fold, allow one edge to slightly overlap the other with each new fold made and ironed. This technique ensures a perfect corner when the napkin is finished, without showing several corners (Fig. 8).
SHEETS: Sheets may be ironed by folding them lengthwise and ironing down the selvage edge from the wide hem to the small hem end. Keep the material taut and straight by placing fingers between the edges while ironing the length of the sheet (Fig. 9). If wrinkles develop, raise the roll at times and give a slight shake to the materials before continuing ironing. After running the selvage edge through, remove the sheet from the ironer and lay it in your lap as it was laid in the ironer. Feed the small hem end in first and iron the other selvage. Next, feed the large hem end in, which is now on top, and iron the creased section (Fig. 10). Keep the creased side held taut and raise the roll again from time to time to avoid wrinkles.
By now, you’ve ironed three sections of the sheet. For the final touch, fold the sheet double and place the unironed quarter section next to the shoe and iron through, completing the sheet. When you’re ironing the sheet for the fourth and last time, remember to occasionally raise the roll and give the sheet a gentle shake. This helps prevent wrinkles due to the sheet’s thickness.
TO FOLD SHEET IN FOUR: Here’s a handy tip for managing the sheet—after it’s been through the ironer three times, gather it at the end of the ironer using both hands (Fig. 11). Take it out and place it in your lap in a ‘U’ shape (Fig. 12). Pick up the sheet, large hems first, and it will naturally fold into an easy-to-manage shape in your lap, ready for the final ironing (Fig. 13).
Other Flat Pieces:
LACE TABLECLOTHS: Large lace tablecloths should be ironed one at a time, with the pattern or raised side facing the padded roll (Fig. 15).
CURTAINS: Panel curtains can be ironed down the center, then folded lengthwise and ironed from the top hem to the bottom, with the folded section over the open end (Fig. 16). Reverse the process, starting from the top again to iron the other side of the curtain, ensuring the fold covers the opposite open end.
After ironing, fold the curtains into smaller folds for storage.
LINENS: Thanks to the Ironrite’s design, featuring two identical and usable open ends, large linen tablecloths can be ironed individually without creating any creases. This method is particularly beneficial for embroidered tablecloths (Fig. 14), ensuring they come out looking pristine and ready for any occasion.
In ironing ruffled curtains, start with the ruffles by positioning them at a 45-degree angle over the pointed end of the shoe (Fig. 17). Iron the ruffles into gathers, working on one section at a time. Then, focus on the selvage edge by laying it lengthwise on the forming board and ironing about three inches into the curtain. Repeat this process along the selvage to ensure the curtain hangs perfectly straight. For the final section, iron across the curtain towards the front ruffle (Fig. 18), and continue ironing in sections until the entire curtain is finished.
If you find the starched material sticking to the roll, it’s better to reverse the roll’s direction rather than pulling the material off.
Ladies’ Wash Dresses
Given the variety in dress styles, each dress requires a tailored approach to ironing.
UNDERARM SEAM: Iron the underarm area by doubling the fabric from the armhole to the waistline or vice versa, ensuring as much of the garment as possible lies flat on the shoe for efficient ironing (Fig. 19).
Note on Zippers: Always open the zipper when ironing the underarm waist seam to prevent the zipper tab from damaging the fabric. Close the zipper when ironing the skirt.
SLEEVES: For dresses without a collar, start ironing towards the center back, then reverse to iron the opposite side. If the sleeves have gathers or fullness at the shoulders, begin by folding at the shoulder seam and letting the sleeve drape below the shoe (Fig. 20).
If the sleeves are gathered or full at the shoulder seams, start ironing from the bottom of the sleeve up to the armhole. Use the press to dry out the cuff before raising the roll to adjust the sleeve for ironing around the armhole seam with the point of the ironing shoe. Lift the roll at the gathered sections and press into the gathers with the shoe point, section by section, until all gathers are smoothly ironed (Fig. 21). Iron the other side of the sleeve in the same manner, using the opposite end of the shoe.
For short sleeves with gathers at both the top and bottom, turn the sleeve inside out, crease, and iron in sections from the cuff to the top of sleeve, the same as on Little Girls’ Dresses.
For Dress Fronts, when a dress is opened down to the waistline, it can be ironed piece by piece. Lay one side of the dress front over the forming board and shoe, ironing one front at a time, each on its respective open end of the board (Fig. 22). If the dress features gathers at the back of the waist or at the yoke, press these sections by creasing on the wrong side and ironing in sections from the waistline to the yoke, adjusting the number of creases based on the fullness.
Collars with a circular design are ironed by feeding them into the end of the roll, over the pointed shoe, and ironed section by section, similar to narrow ruffles. Alternatively, start with the right edge of the collar, feeding it over the forming board section by section, until the entire collar is smoothly ironed, as you would with blouses (Fig. 33, page 14). For straight collars, lay them flat and straight over the forming board, using the pressing control for a crisp finish (See Shirts, Fig. 51, page 18).
Skirts should have their hems ironed first to ensure an even hemline. Feed the hem into the machine as depicted in Fig. 23. Then, drape the body of the dress over the shoe and forming board, similar to using an ironing board. Start with the unironed section at the back of the waist first (Fig. 24), then proceed to iron around the skirt. Always position the dress so that the wrong side faces the shoe, enhancing the print on printed fabrics and ensuring a superior finish on all materials.
For Circular Skirts, iron them a section at a time, starting with the hemline (Fig. 25). Use the pressing control to dry the double thickness of the hem before moving up to the waistline. Alternate ironing sections from the hem halfway up the skirt and from the hem to the waistline to evenly cover the skirt’s body, accommodating its narrower top compared to the bottom.
Pleats benefit from the Ironrite’s design, allowing for hands-free ironing. Position the pleats and feed them in at an angle to hold them in place under the roll; then press down (Fig. 26). An exclusive Ironrite method involves placing the skirt on either end of the roll, pinning the pleats in place (Fig. 41 and 42, page 16), rotating the roll to position the pleats underneath, and then pressing them into place.
UNPRESSED PLEATS: Start by dropping the waist inside the skirt. Then, grasp the waistline seam from the wrong side and position it over the forming board at a 45-degree angle (Fig. 27). Iron a small section, about two or three inches, and use the press to set the pleat firmly. Lift the roll and continue this method until all pleats are neatly done. Afterwards, turn the dress right side out, drape the skirt over the shoe, and iron at an angle to neatly finish the bottom section of the skirt.
Blouses
UNDERARM SEAM: Fold the fabric double and lay it lengthwise over the forming board, ironing up to the dart (Fig. 28).
SLEEVES AND SHOULDERS: For plain sleeves, start ironing from the cuff up to the armhole (Fig. 29). Then, lift the roll slightly, shift the sleeve a few inches off the end of the shoe, and continue ironing across the shoulder up to the collar (Fig. 30).
CLOSED BACK OR FRONT: For blouses with a closed back or front, lay the closed section over the shoe at an angle. Begin ironing from the center back towards the sleeve seam. If the blouse features an action back (pleats), arrange it as shown in Fig. 31 and press firmly into place. Iron the other half of the closed section in the same manner on the opposite open end.
OPEN BACK OR FRONT: Start ironing from the bottom of the blouse half-section up to the armholes. Lift the roll, reposition the blouse, and press into any gathers at the yoke (Fig. 32). Repeat the process for the other half-section on the opposite open end.
COLLAR: The instructions for blouses with collars are similar to those for Ladies’ Wash Dresses. If the blouse has a circular collar, begin with the right edge and feed it over the forming board, section by section, until the collar is fully ironed (Fig. 33).
NOTE: For blouses with lace edges or tiny ruffled trims, these should be pressed flat and ironed last to ensure they retain their delicate appearance without any creases.


Get 10% Off Your First Vintage Find
Subscribe to receive a 10% off welcome coupon by email, plus early access to new vintage drops, behind-the-scenes sourcing notes, and scans of the old photos, programs, and paper ephemera I uncover and digitize.
Almost there! Please check your email inbox right now and click the link in our confirmation message to complete your subscription. (If you don't see it, check your spam folder!)