
How do you measure yourself for buying vintage clothes that fit perfectly (or close to perfectly)? The way to measure someone to fit How can you measure yourself for purchasing vintage clothes that fit perfectly (or at least come close)? Measuring for clothing hasn’t changed much since the 1930s — or even the 1880s! In fact, proper measurements have always been the key to well-fitted clothing throughout history. When it comes to vintage pieces, it’s even more critical to know your accurate measurements. Many vintage garments were made in an era before standardized sizing was introduced, so learning to measure yourself is essential to finding a good match.
Here’s some historical context to consider: The concept of ready-to-wear clothing first became popular during the late 19th century due to industrialization and advances in garment production. However, even as ready-made garments became widespread, there was little to no consistency in sizing. Sellers would often provide measurement guidelines or tailor-made options. Similarly, post-1930s catalogs, such as those by Sears or the Chicago Mail Order Company, often included illustrated guides to taking measurements since consumers purchasing remotely could not try on garments before buying them. These same methods remain useful today when it comes to buying vintage fashion.
Most vintage sellers still rely on these historical practices, measuring garments “flat.” This means the clothing is laid out on a table, and dimensions like the chest, waist, and hips are measured. These flat measurements are often doubled (where applicable) to replicate how they would fit on a body. Knowing how garments are measured can help you interpret the sizes and determine whether a piece will comfortably fit you.
Step-by-Step: How to Measure Yourself for Vintage Clothing
Get started by taking your own measurements with a flexible measuring tape. Here’s how to record them:
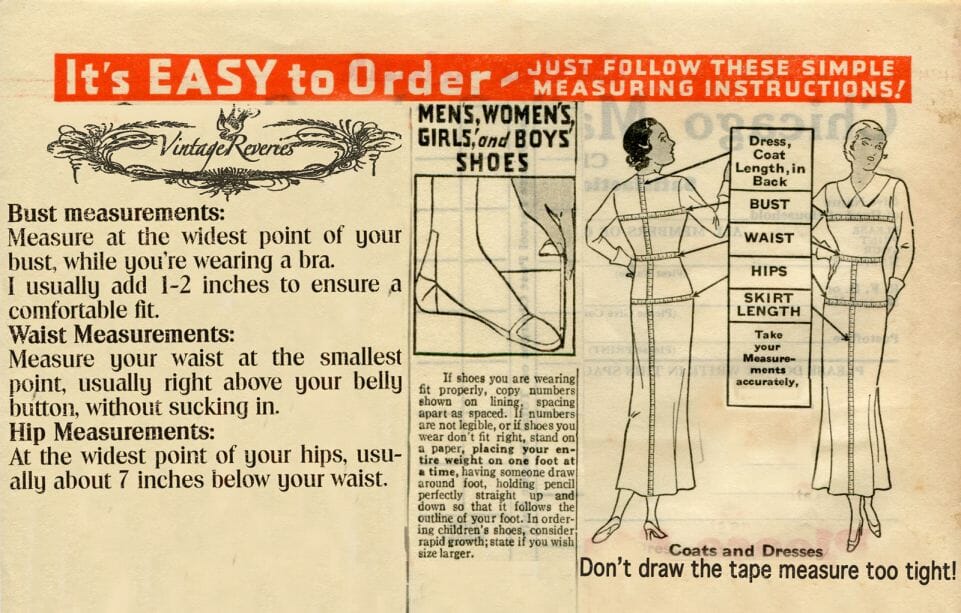
1. Bust Measurement:
- Measure at the fullest point of your bust while wearing a bra that gives you a natural shape.
- Historically, bust measurements were extremely important, particularly for women’s clothing in the mid-20th century when tailored silhouettes like those of the 1930s and 1950s emphasized this area.
- Add an extra 1-2 inches to ensure some breathing room.
2. Waist Measurement:
- Measure your natural waist at its smallest point, which is typically just above your belly button.
- Avoid sucking in, as older vintage pieces — like 1950s dresses or 1930s gowns — often accounted for the natural curvature of the body, not a tightly-cinched midsection.
- This measurement is especially vital, as many styles from the 1940s and earlier focused heavily on an hourglass shape.
3. Hip Measurement:
- Wrap the tape measure around the widest part of your hips, generally about 7-9 inches below your natural waist.
- Don’t pull the tape too tight; vintage pieces, such as 1920s flapper dresses or 1970s bohemian skirts, were often designed to skim the hips rather than cling to them.
For all three measurements, it’s wise to keep a little extra “wiggle room.” Vintage garments, pre-dating the introduction of synthetic stretch fabrics in the 1960s, were constructed from rigid materials like cotton, wool, or rayon. Because of this, vintage clothes often don’t have the flexibility of modern clothing.
As a general rule, if your measurements fall between the flat measurements of a garment and you’re unsure, always size up rather than down. It’s much better to take in a piece that’s slightly too large than to risk something being too tight to wear comfortably—or zip up at all!
Don’t Forget Additional Fit Details
Clothing of certain eras can also have unique sizing quirks. For instance, women in the 1930s and 1940s wore smaller undergarments (like girdles and corsets), which impacted how dresses fit and laid on the body. Similarly, armholes and wrist measurements from vintage clothes might feel uncomfortably snug by today’s standards since bodies—and fashion preferences—have changed over decades.
If a seller doesn’t include certain specific measurements in their listing, such as sleeve width or length for long-sleeved items, don’t hesitate to reach out. For example, if your wrists are slightly larger, confirming the cuff size for a long-sleeve blouse or jacket can save you disappointment later.
Why Measurements Have Always Mattered
Before standardized sizing became commonplace in the 1950s, most clothing—whether store-bought or custom-made—was designed with a highly tailored fit in mind. Early dressmakers took exacting measurements to ensure clothes fit neatly over corsets, bust padding, or girdles, which sculpted the body. As ready-to-wear fashion grew, particularly after World War II, clothing sizes began to vary more significantly between brands and regions, causing confusion that persists today.
This lack of consistency is one reason vintage fashion today still relies on precise measurements, a tradition that began over a century ago. Knowing how to measure yourself with historical accuracy comes in handy not only for buying clothing but also for appreciating the skill and art that went into vintage tailoring.
Final Tips for Shopping Vintage
Here are a few more things to keep in mind:
- Fit vs. Comfort: Most vintage pieces were designed to fit snugly, as loose or oversized garments weren’t in vogue until more modern decades like the 1970s and beyond. Always confirm your measurements and opt for slightly looser fits if personal comfort is a priority.
- Era-Specific Fits: Understand the era you’re shopping in. For instance, flapper dresses of the 1920s typically hung straight with minimal definition, whereas 1950s fashions often embraced cinched waists and fuller skirts.
- Repairs and Alterations: If a garment is close to fitting but needs minor adjustments (a larger bust, waist, or sleeve size), consult a tailor familiar with vintage clothing. Skilled adjustment can make a huge difference in bringing a garment back to life for modern wear.
Online sellers often include the measurement practices as mentioned above, but you can also ask for additional details if you’re unsure about tailored or rare pieces. Beyond just wearing vintage clothes, understanding their origins and the craftsmanship of past generations adds an extra layer of appreciation.
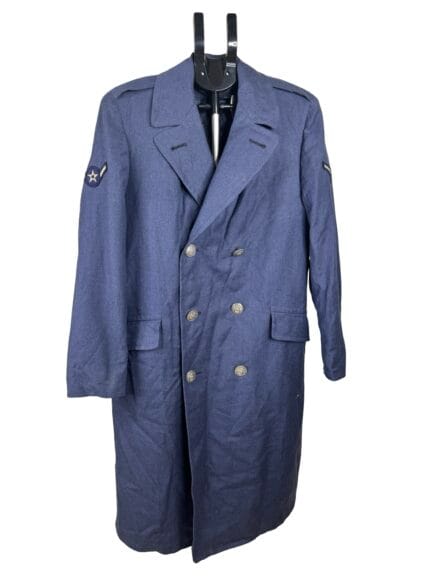
So next time you eye a dress from the 1950s or a coat from the 1940s, take the time to measure yourself carefully. You’re not just finding a good fit — you’re preserving and celebrating a piece of history!
For further guidance, see the illustrated measuring guide that I made below, out of the pages scanned from the 1935 Chicago Mail Order Catalog. Good luck shopping for vintage treasures!


Get 10% Off Your First Vintage Find
Subscribe to receive a 10% off welcome coupon by email, plus early access to new vintage drops, behind-the-scenes sourcing notes, and scans of the old photos, programs, and paper ephemera I uncover and digitize.
Almost there! Please check your email inbox right now and click the link in our confirmation message to complete your subscription. (If you don't see it, check your spam folder!)